Hack Kit Series: Closer look at Capacitive Soil Moisture sensors

Hello Makers,
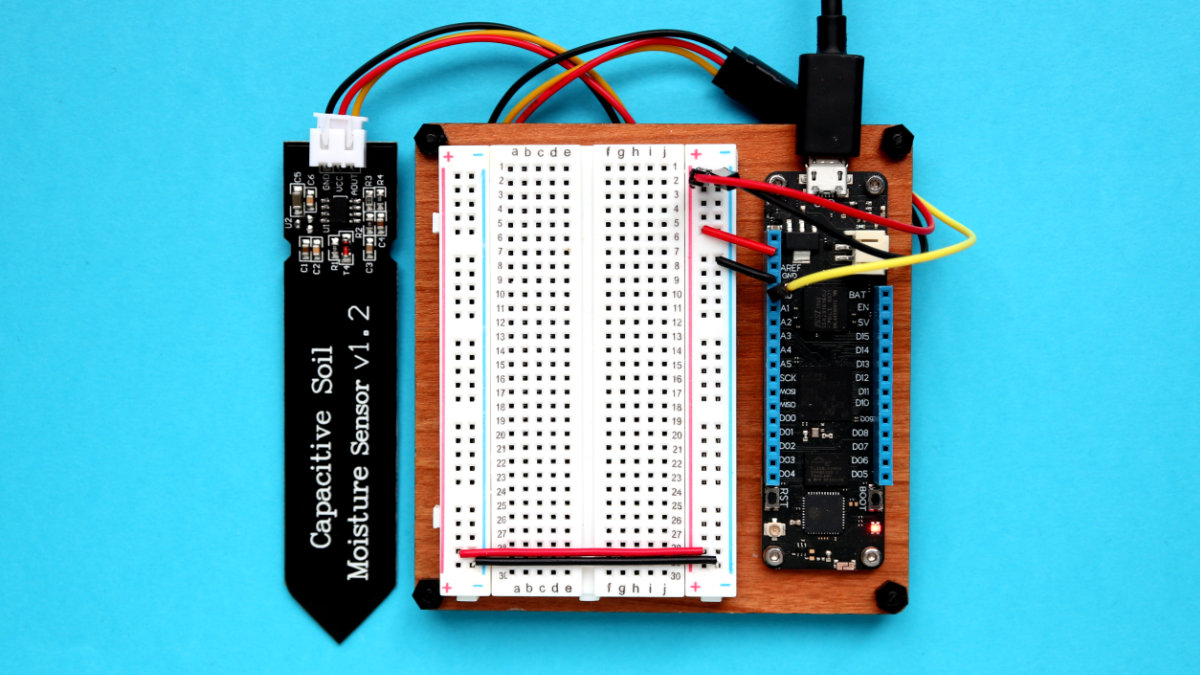
In this post we’re going over the Capacitive Soil Moisture sensor included in the Hack Kit. Capacitive Moisture Sensor is a soil moisture sensor based on capacitance changes. When the humidity of the soil rises, the value of the output decreases; conversely, when the humidity decreases, the output value becomes higher. We’ll go through the process of connecting it to your board, calibration, initialization and finally usage so you can find great use cases for your projects with this handy peripheral.
To work with this sensor, you’ll need to add the NuGet package Meadow.Foundation.Sensors.Moisture.Capacitive to your Meadow project.
Circuit Sample
Calibrating the sensor
To calibrate your moisture sensor, we need to get the edge case values where the sensor is its most dry state and most wet. You would think these cases would be sensing in open air and dipping the sensor in water, but when having placing the sensor in dirt for example, these values will change so its best you always look for these values specifically for the type of soil you plan to place it in.
To find these calibration values, we can create an AnalogInputPort with the port connected to the sensor, and print out the readings every second while we place the sensor in its medium where its most dry and where its most went, and we just copy those values somewhere.
var analogIn = Device.CreateAnalogInputPort(Device.Pins.A00);

float voltage;

while (true)
{
    voltage = await analogIn.Read();
    Console.WriteLine("Voltage: " + voltage.ToString());
    Thread.Sleep(1000);
}
Code Sample
Now to actually use the Capacitive driver, we will need to first initialize it, and for that there’s two ways to create an object (explained below), and there’s also two ways to use the sensor.
Initializing
To initialize, you can either pass in an AnalogInputPort created before instantiating the Capacitive object. Also you need to pass the calibration prior using the sensor:
var capacitive = new Capacitive(
    analogPort: Device.CreateAnalogInputPort(Device.Pins.A01),
    minimumVoltageCalibration: [Min Value],
    maximumVoltageCalibration: [Max Value]);
Another way is to pass in the Device and the Analog Pin so the driver creates the AnalogInputPort internally:
var capacitive = new Capacitive(
    analogPin: Device.Pins.A01,
    minimumVoltageCalibration: [Min value],
    maximumVoltageCalibration: [Max value]);
Regular Sensing
A conventional way to use the Capacitive sensor is to just call the Read() function, and do any actions based on the humidity value returned. In the code sample, we read the sensor and print it on the console as a percentage:
while (true)
{
    float moisture = capacitive.Read().Result;

    if (moisture > 1.0f)
        moisture = 1.0f;
    else
    if (moisture < 0)
        moisture = 0;

    Console.WriteLine($"Moisture {(int) (moisture * 100)}%");
    Thread.Sleep(1000);
}
Sensing with IObservable
A more powerful and convenient way to use this sensor is using the IObservable pattern, which allows you to subscribe to an observable, with an optional predicate to filter on the events, as well as a handler shortcut.
var consumer = Capacitive.CreateObserver(
    handler: result =>
    {
        string oldValue = (result.Old is { } old) ? $"{old:n2}" : "n/a";
        Resolver.Log.Info($"Subscribed - " +
            $"new: {result.New}, " +
            $"old: {oldValue}");
    },
    filter: null
);
capacitive.Subscribe(consumer);

capacitive.HumidityUpdated += (sender, result) =>
{
    Console.WriteLine($"Updated - New: {result.New}, Old: {oldValue}");
};

capacitive.StartUpdating();
There is also an Updated event which activates every time the sensor activates to do a reading.
That’s a wrap
This is all I wanted to show you in this quick post. If you want to read more in depth about the Capacitive sensor API, feel free to check to our official API docs. You can check this Hackster project that uses a Capacitive sensor.
Happy hacking,
Jorge


