

The Smartening of my Dehydrator – Part 1
In this blog series, I document the process of creating a smart appliance out of my dehydrator. Along the way, I’ll show you just how easy it is to create a sophisticated, connected appliance with Netduino.Foundation, which makes hardware development a plug-and-play experience. We’ll also use Xamarin to provide mobile app connectivity and C# development experience, end-to-end.
Project code and schematics can be found here.
Part 1 – Intro & Overview
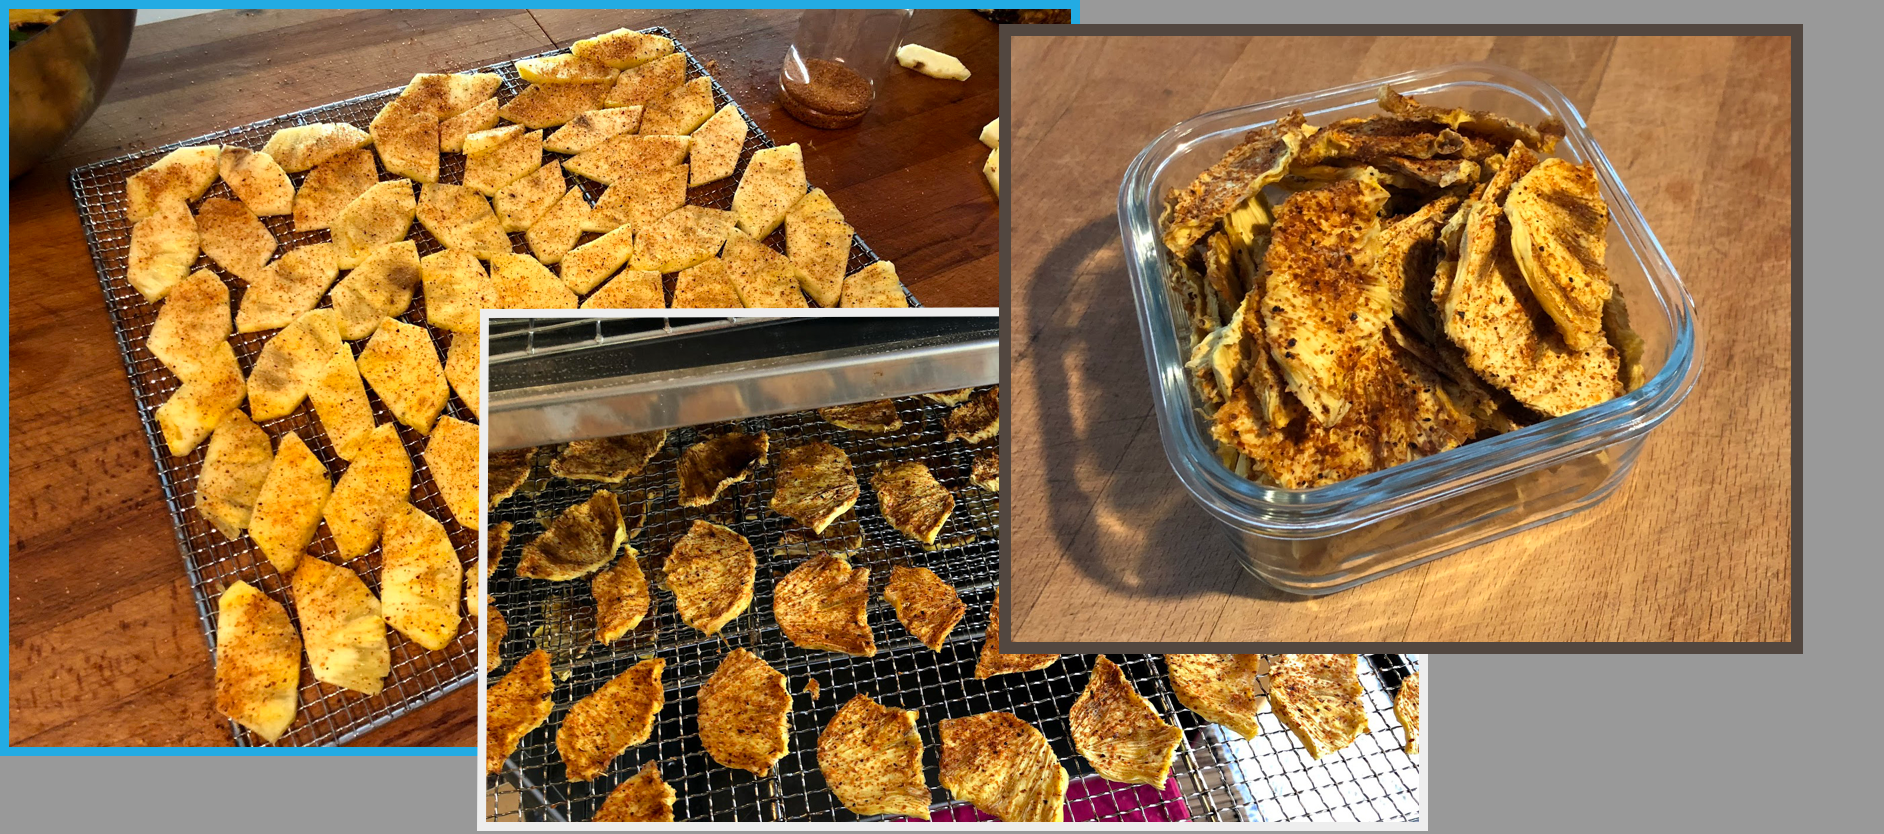
A couple years ago, I bought my wife a really nice food dehydrator. We hike a lot, and I thought it would be cool for us to try and dehydrate our own snacks. We dehydrated everything, from apples to zucchini (apples good, zucchini gross). But what we really, really liked were pineapple slices with Tajin (tah-HEEN). We would wait for pineapple to go on sale, and then buy them by the shopping cart load, and make tasty backpacking snacks.
Then one day it broke. The dehydrator was not cheap, and we were both pretty bummed out that it went so quickly. A friend of mine and I decided to tear it apart to see why it died, and after much testing, it appeared that the $1 microcontroller brain from the 80s that they used in it had somehow failed. However, the important parts of it; the heater and fan were still both perfectly fine.
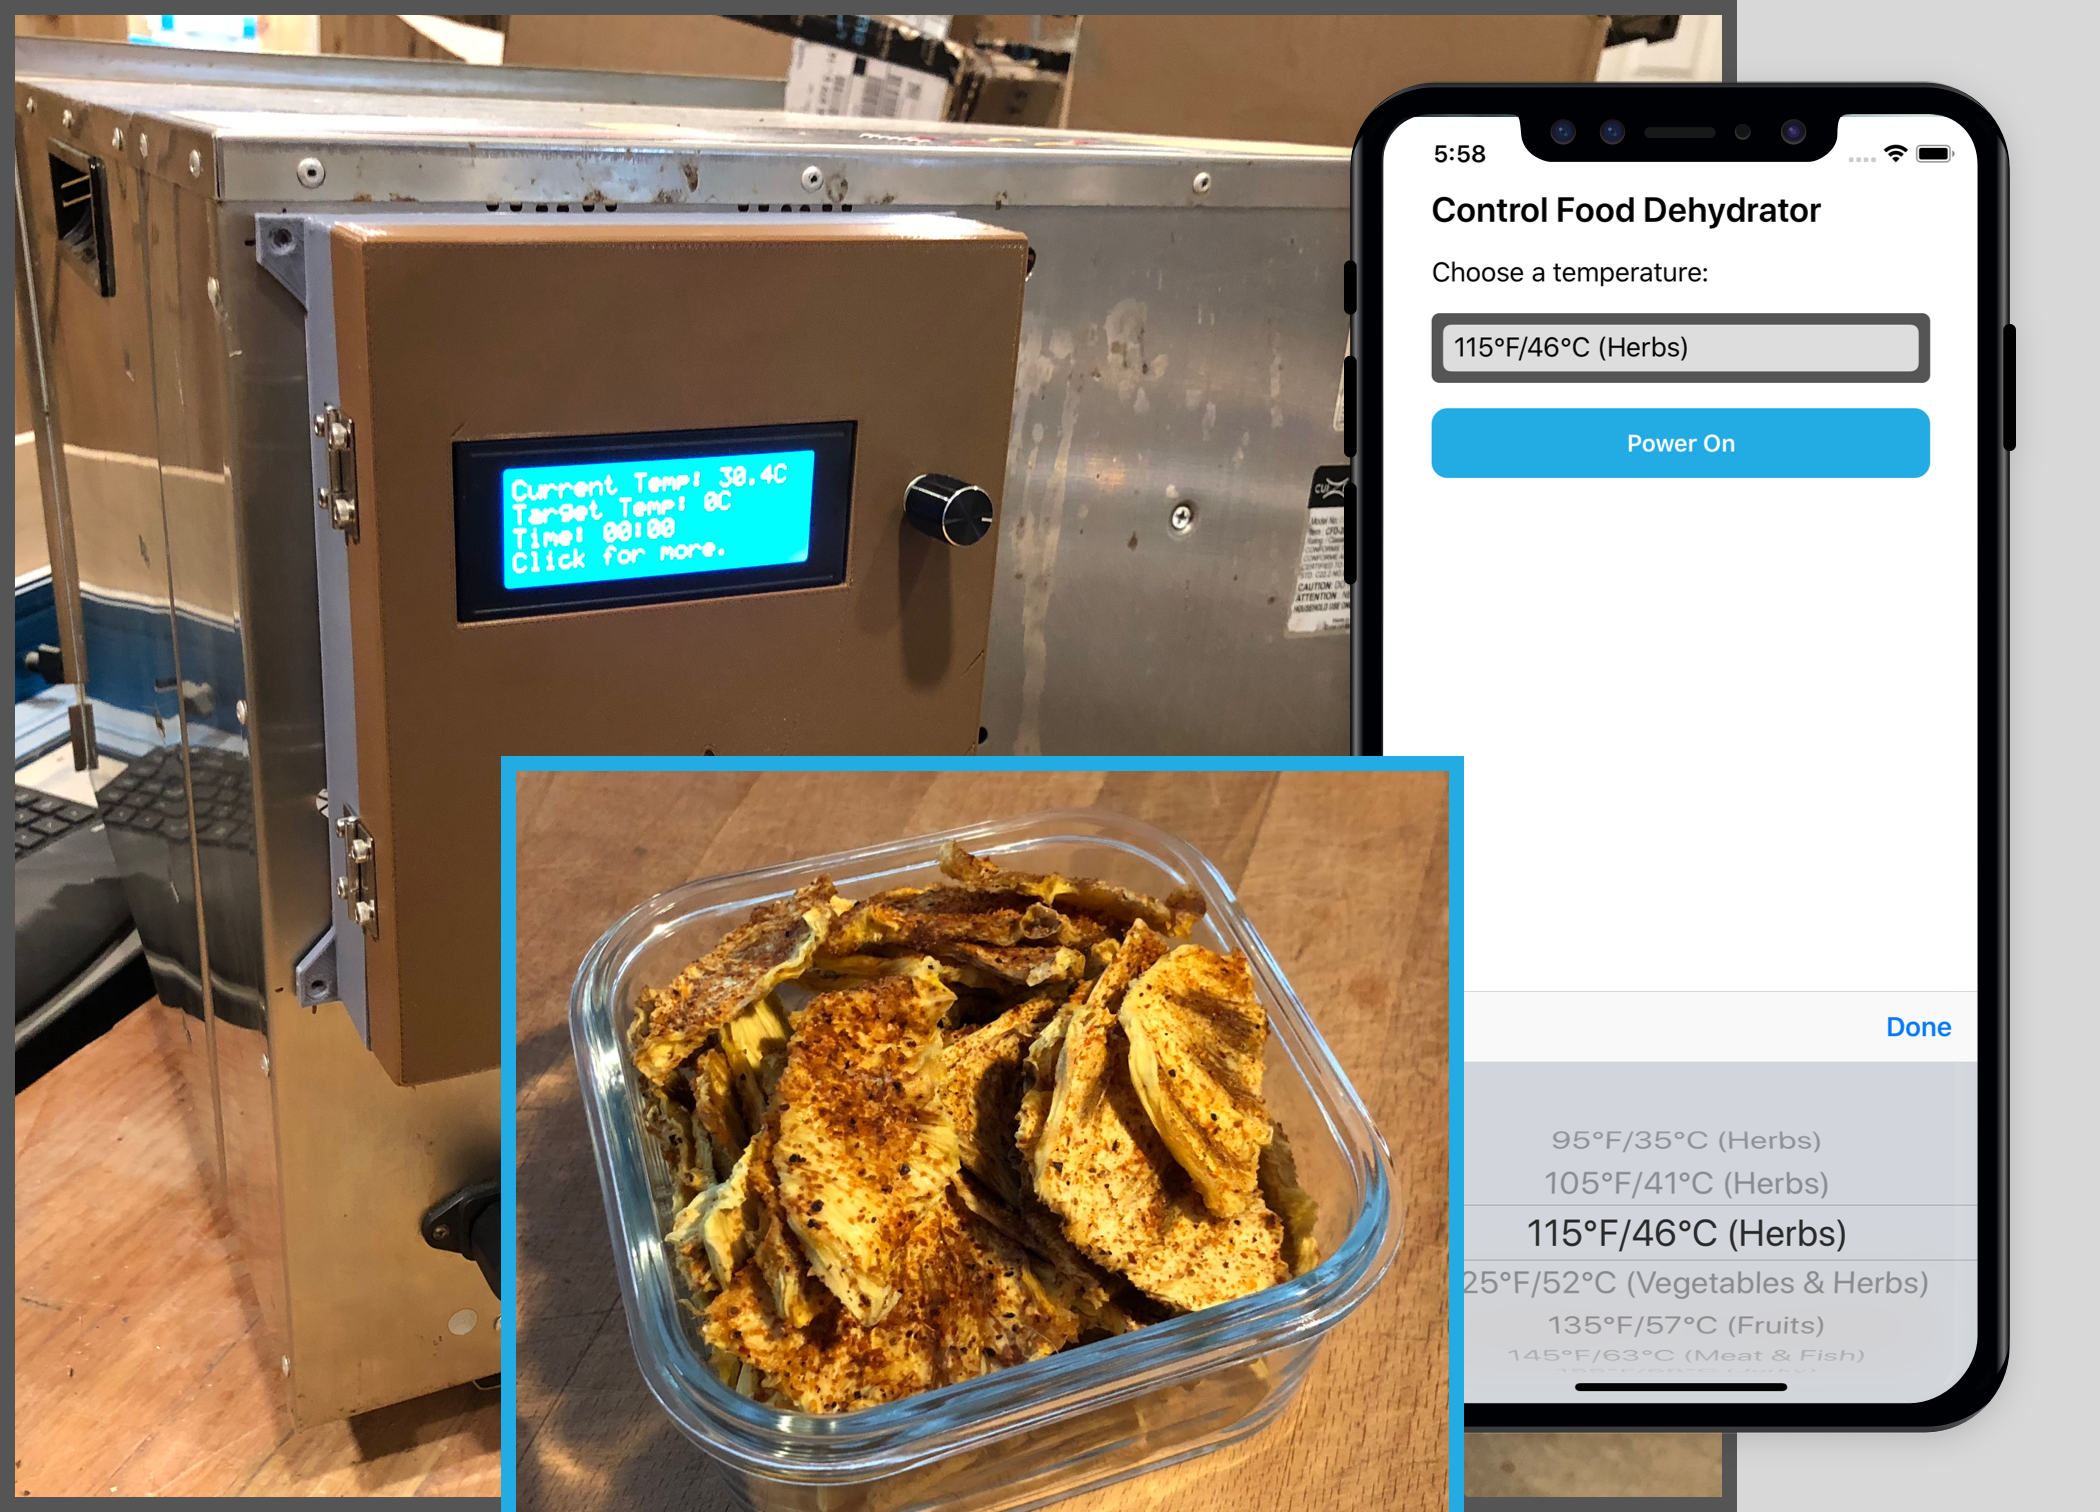
So we ripped the guts out of it and remade it. We remade it better, smarter, and connected. In the end, we got our dehydrator back with upgrades. Now, we have a dehydrator that’s has a much better interface, and I can control it with my phone:
What’s more; from end to end, the entire solution was written in C#!
Dehydrators are Low-Temperature Ovens
A dehydrator is a great model for appliance hacking; it’s really just a low temperature oven and shares a lot of things in common with other appliances. You can take the patterns and solutions here and apply them just as easily to a toaster oven, or any number of other appliances.
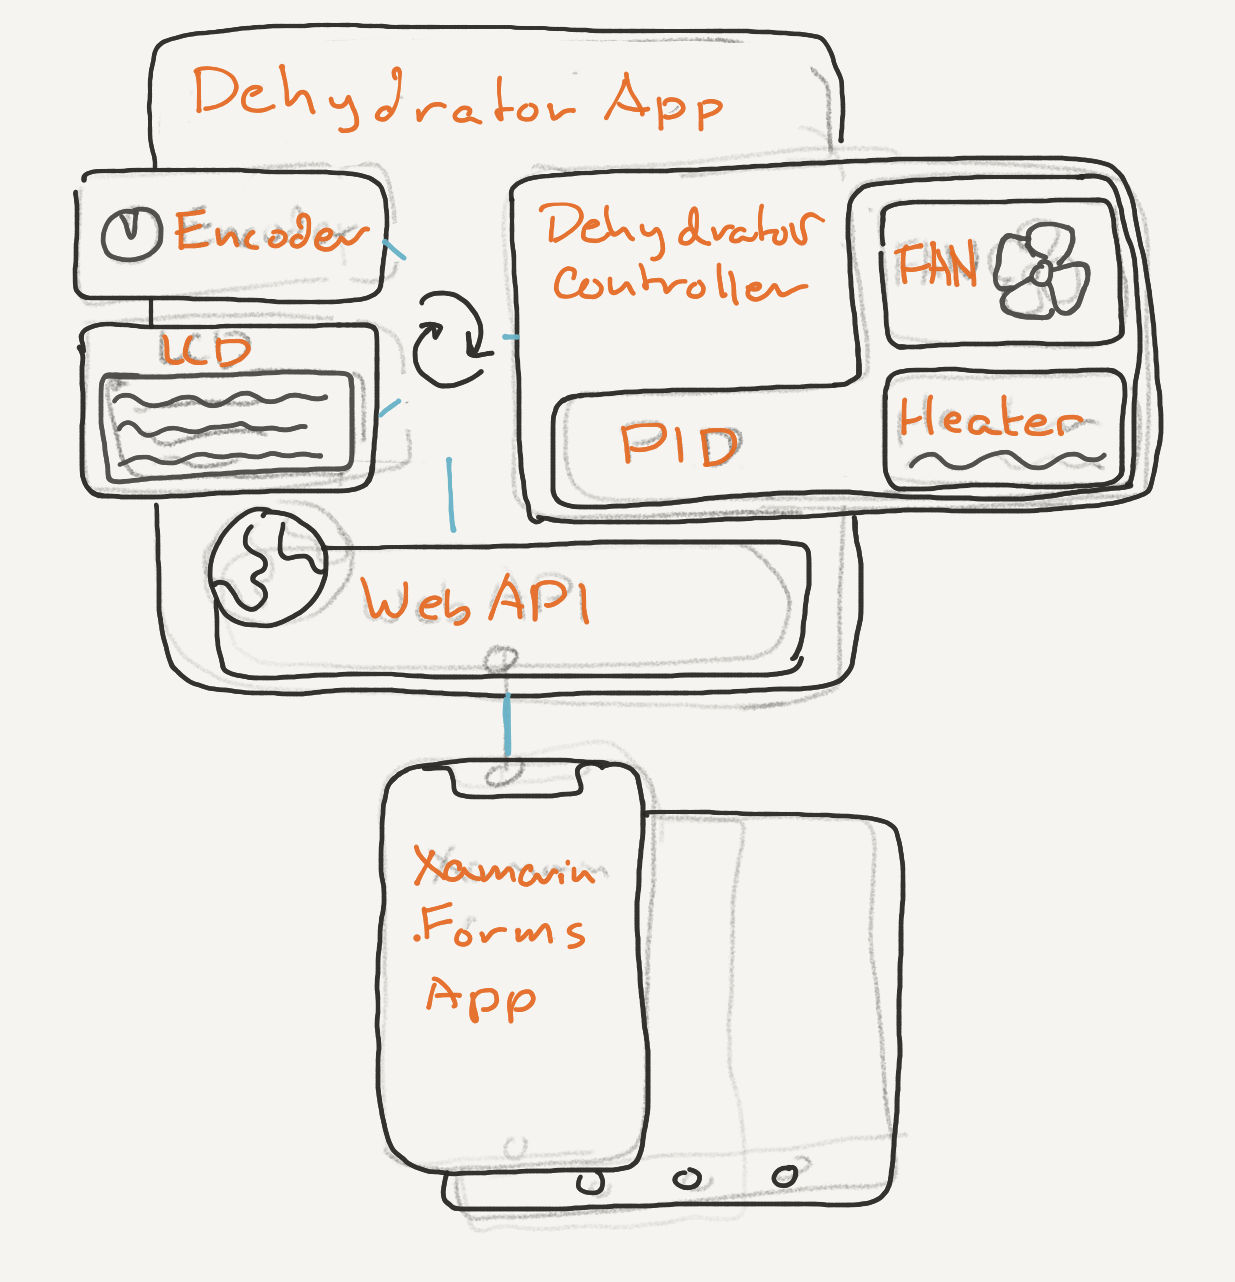
Dehydrators are simple appliances; they blow heated air through a semi enclosed container which slowly dries out the food. Depending on the temperature of the air, the food also undergoes a low-temperature cooking. The air blows the whole time the dehydrator is on, but the temperature is set depending on the type of food being dehydrated. From a control standpoint then, the dehydrator, as a controller has three major control components:
- Fan – This helps desiccate the food and is always on when the dehydrator is running.
- Heater Element – The heater element has to be controlled in such a way as to make sure the internal temp of the dehydrator is at a particular set point.
- Run Time – Usually, a dehydrator is set to run for a particular amount of time, typically specified in hours.
Additionally, the internal temperature is monitored by a temperature sensor that feeds back into the control system, and we use the PID algorithm to regulate the temperature.
Mobile apps are a fantastic control gateway to connected things; they allow you to have sophisticated control and information display in the palm of your hand. So my connected dehydrator had to have a mobile app, as well as a way to connect and control, so we added a RESTful Web API and server to the Netduino application to expose API endpoints.
System Overview
From a high level then, our solution looks something like this:
3D Printable Enclosure
To house all the electronics, control systems, and provide a LCD interface, I created a 3D printable appliance hacking enclosure:
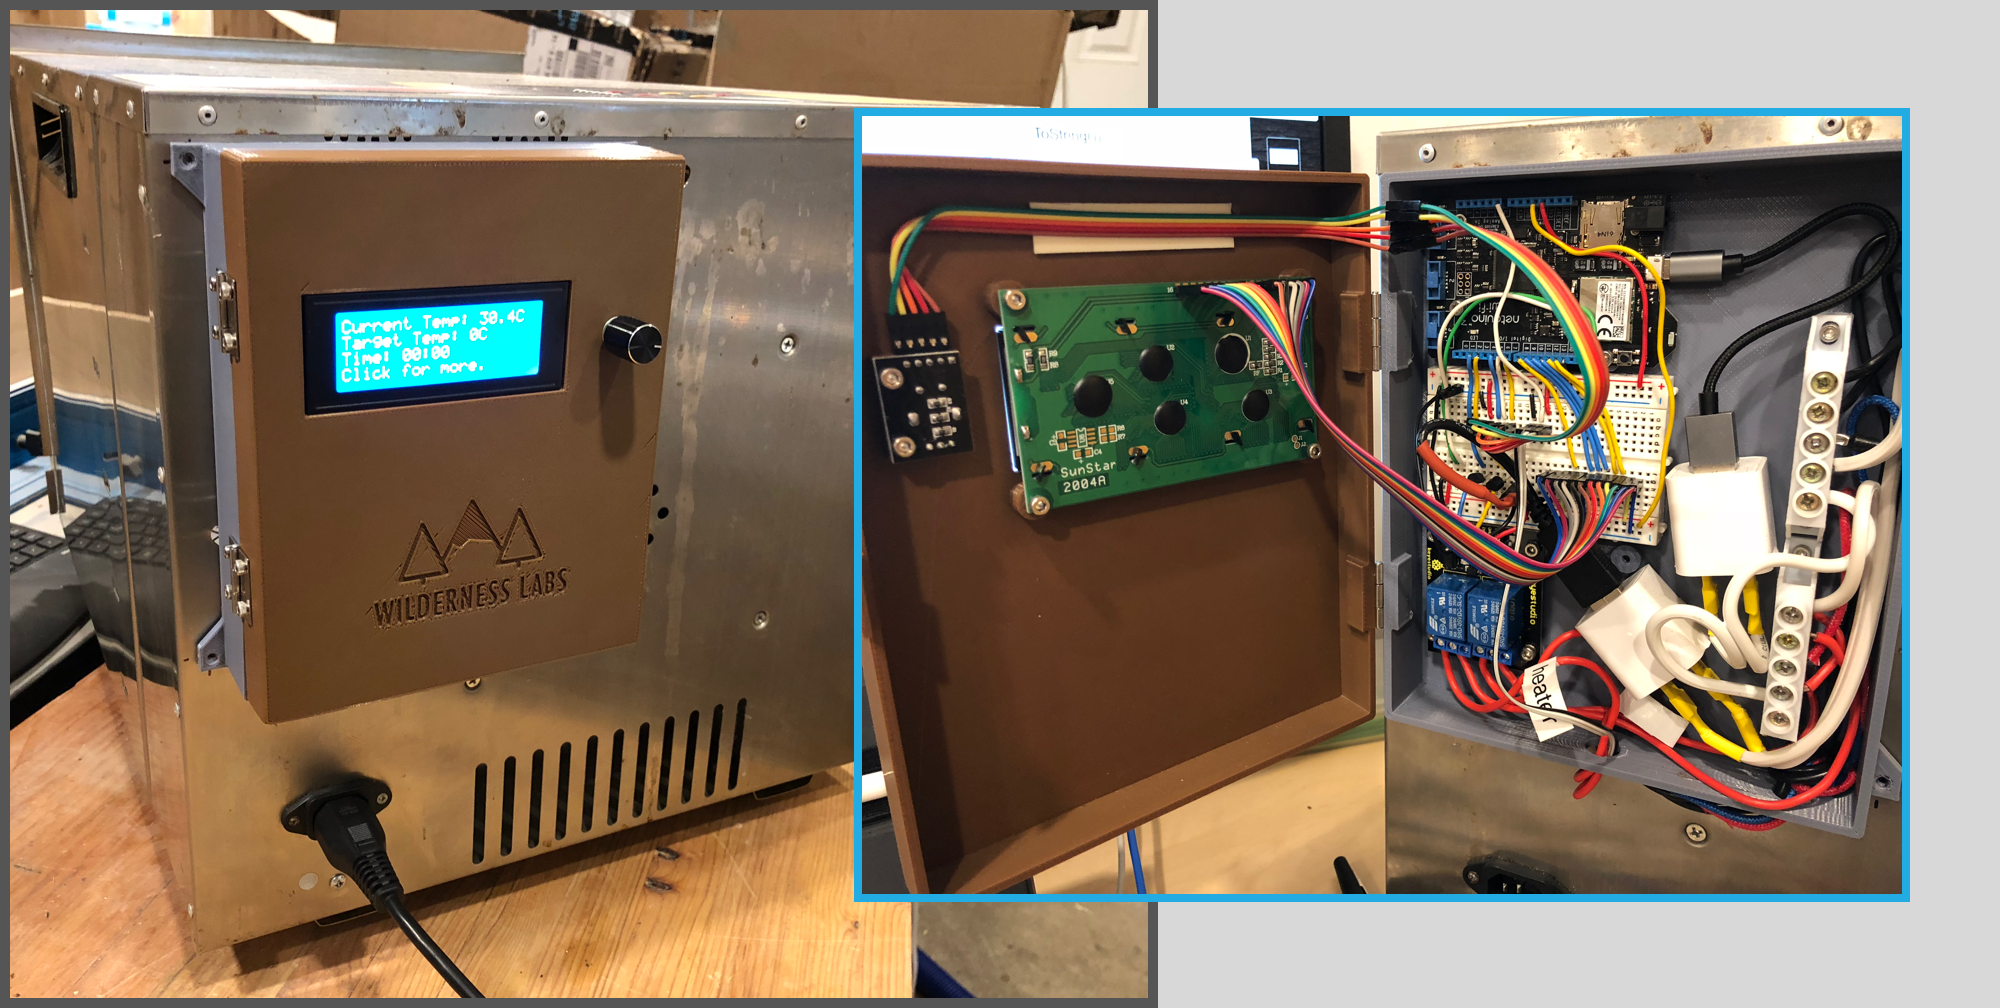
The enclosure was built specifically for appliance hacking; it has household mains terminal breakouts, mounts for the Keyestudio relay, LCD screen and rotary encoder, and room to mount USB power adapters and route power.
You can find the files and bill of material (BOM) for the enclosure on our 3D Print Designs github repo.